Project Charter Assignment 2
Assignment 1 Title: Digital Wallpaper.
Project Start Date: 15 December, 2008.
Project Finish Date: 02 January, 2008.
Project Manager: Md. Obayedullah Khan
HP: +60136246762
Email: barisal35@hotmail.com
Website: http://mcg1024-1041110316.blogspot.com/
Project Objective:
Faculty of Management (FOM) is located next to the HR building, Multimedia University at Cyberjaya Campus. It is one of the seven faculties in the University. Its aim is to provide and maintain an environment conducive towards independent learning, research and intellectual enquiry, with emphasis on the changing needs of the new millennium. I will be doing this digital wallpaper for MMU FOM open day for future students and showing them the quality of the faculty by looking at the wallpaper that I have created for FOM to attract people to come and join and also be a part of diversity.
Approach:
I will be creating a wall paper for FOM. I've taken few pictures of fom have chosen on the best one and also use some pictures from the internet, which are included in the reference folder. .the design techniques was based from the technique which was taught throughout the tuttorial session.The tools used was Rectangular Marque Tool to draw d background,Magentic Lasso Tool and Magic Wand Tool to crop the students image, maskot,fom building n also used for some amendment and croping for the background,Brush Tool to design,Clone Stamp Tool which was used to edit some part of the pictures that was mistakenly deleted,Eraser Tool to erase,Paint Bucket Tool to fill colours,Hue / Saturation to make the variety of my wallpaper have different kind of brightness,Type Tool to add wordings and also Eyedropper Tool to select colours.
Roles and Responsibilities:
1 December 2008-6 December 2008 =search the image from internet
7 December.2008-8 December 2008=Try to edit and find some suitable tutorial from the internet.
12 December 2008=submit the Project charter
13 December 2008-18 December 2008=recreate and modify the word I done before and redo my wallpaper.
20 December 2008=edit the Project charter
1. “Students are to submit the original PSD files (DO NOT FLATTEN THE FILE) together with the images used in the wallpaper. Call the file StudID_asssignment2.psd”.
2. “Place the files in separate folders. One folder containing the PSD file called Wallpaper. The other images used are to be placed in a folder call Wallpaper_ref”.
Comments:
I believe there is still a big chance for me to learn more about Photoshop. There is always a chance to improve my work using Photoshop.
Thursday, January 1, 2009
Monday, December 29, 2008
Assignment-2/wall paper/1041110316

Here is my Final Output
 In this final step, i created another box and i connected to the box which includes the courses and i apply all effects which i have applied for previous boxes. For course actually i open a new layer and then i wrote courses and after i wrote courses i use the tool magic wand and i select the courses letters. So, that i can copy it as an object. Then i went to my original layer which is MMU open day and then paste it there. I put it in the box which is connected to the box of courses. ( i did it because it is easier to control the object no matter which side i want to put. So that i can move it as i wanted.
 In this step, i took another image of MMU students and i added some effects which is drop shadow and inner glow.
Here, i took a photo of another MMU logo which i have edited and erase the white background of the logo. So, it will look more matched on the image.

In this step, i add the logo of MMU with FOM text which i have created. i combined the logo for MMU and FOM text to make it look like 1 logo all together. i use 3 filters for that. Those are sketch filter, glass filter and then lighting effects. For the lighting effects i choose for texture channel alpha-1 which i have created before. ( i create a new channel and then i used brush for MMU logo. which i created also and apply glass filter. I applied the same filters on the text FOM.

Over here, i choose the horizontal type tool and i wrote in the 1st box open day as text and 2nd box post graduate as text and 3rd box 21st Mrach,2009 and 4th box the courses of FOM.

In this step, i connect all the boxes with eachother using more boxes to make all the boxes interconnecyted. i applied the same effects and colors like step 1.

Here. i add another 2 boxes and i applied the same effects and colors, which is light brown and applied whatever i applied in the 1st step.

Over here, i add another box in to the image and i applied whatever i applied in box 1 in the 1st step.

Steps: (upwards)


Reference Pictures: (upwards)

This is the picture which i took inside of FOM building.
Sunday, December 21, 2008
Exercise-6/ 1041110316

Here is my final output

In this step, i select the original layer of the object 70,s and then we open hue/saturation. After that i took the colorize and i kept on changing the colors until it was suitable with the background. After that i create a new layer and i select the original layer and then i pressed ctrl+del and filled it up with black. So, i created another layer containing the object 70,s and i resized the object to make it larger than the original object. The object that i made is only the shadow of the original object. Thats why i decrease opacity until it looked like a shadow to me and that was last thing i have done for this exercise.

Over here, i pressed ctrl+click on the layer for the 70,s and then i made sure that the layer for the us$ is high-lighted. After that i went to icon mask and i clicked on it. so that i can get expected output which is shown in this step image.

In this step, i pressed ctrl+m, so i can get the curve settings and i pressed load, so that i can get the file i have saved earlier. The reason behind doing this is to get the settings which i have applied on the object 70,s.

Here, i used filter Gaussian blur

Over here, i choosed the us bank note of 20$ and then i pressed ctrl+u to get hue/saturation and then i changed the saturation to -100.

Here, i pressed ctrl click on the channel alpha-3 and then ctrl+c. After that i went to my layer which i have created and press ctrl+v.

In this step, i changed the color of the background by pressing ctrl+i.

Over here, i moved alpha-2 5 steps right and 5 steps up. i also moved alpha-2 copy 5 steps left and 5 steps down. Then i applied some modification using image/calculation. After that, alpha-2 and alpha-2 copy they merged and made up a new channel called alpha-3. Then, ctrl+m to get the curves and i shaped the curve as m shape and i saved it.

In this step, i have made a new layer and after i selected the path, so i filled up the selection using ctrl+del and then i went back to channel and i created a new channel. I have also applied some modification using stroke. i duplicate my channel and it was named as alpha-2 copy.

Here, i have selected the path which has been already created for us.

In this step, i have applied a filter called lighting effects and then i choose a texture channel named as alpha-1, which i have created before and thats how i have created my background for the image.

Here, i created a new layer and i used the brush to color it.

I created a new channel which is alpha-1 and i filled it up with cloud by applying filter ( filter/rander/cloud) and then i used a filter called reticulation, then i applied another filter called extrude.

i opend the background image, which is white.
Here are the steps which i have followed while doing my exercise-6.
Thursday, December 18, 2008
Exercise-5/ 1041110316

Here is my final output
 Here, i went to filter again. went to render and then light effects to make the background look more real. Then choose lasso tool again and open a new layer and then press ctrl+del and i went to filter then render and then clouds and then ctrl+L. After that went to filter again and press blur to put smoke on the image.
 Here, i duplicated the background. so that the original background wont be affected. I took the copy of the background, select the background of yoga man and i clear it using magic wand tool.
 Press Alt and then i made a copy of the flame to move it to the other hand. After that i went to edit, transform and then flip horizontal. Then i used the eraser to modify the flame a bit.
 Select layer 2 the flames and then press ctrl+click. After that i went to layer 3 which is the colors and then add layer mask.
 After that i used the brush according to the need. Arranged the flames to make it look like real fire flame and then i used the rectangular marquee tool and draw a rectangle, change the color. After that i went to filter and then render and then clouds.
 Here i used the rectangular marquee tool and select the shape of the flame and go to edit and press define brush preset. After that i made the flame invisible using layer options.
 At first i used brush paint to make a flame shape. I made the flame shape using lasso tool. Then press ctrl+del and after that i used the brush tool again and change the hardness to 0.
Lets see the process of doing it: (upwards to see the final output)
My learnings from this exercise: In this tutorial i have learned how to apply the techniques of Layer Style effects, how to use the advanced Blending Effect Techniques, Blend two images together using the Layers styles blending options, techniques of applying brush stroke with effects, curve effects and techniques.
Thursday, December 11, 2008
Exercise- 4/ 1041110316
In this tutorial, I have learned how to create water texture & ice texture. Beside that, I have also learned to create effect for wordings such as drop shadow, inner glow, outer glow & how to adjust the angle, distance, spread, size and how to use effects to present the original image in a different way.
 Here is My Final Output
 Here i used the rectangle tool and so i create a mask vertical thumbinal and then i create another mask. After that i clicked the new mask which i created and i pressed ctrl+del. So, that the background will be hidden. I used custome shape tool to draw the shapes.
 Over here i just drag all the effects i had applied on the "ink" word to the window of styles and then i create a new style and then i applied on the rest of the objects in the image.
 Here i went back to inner glow again. I select the blend mode to screen, opacity 89%, technique softer, choke 94%, size 8px and i used green mixed black colour.
 Next i clicked outer glow. Choose green colour and change the blend mode to multiply and for technique i chossed softer.
 After that i went to inner shadow; change the distance to 2px, change choke to 35%, size 9px and change the angle to 148.
 I choose the green colour and then change theangle to -174. I opend layer style again to drop shadow. After that i changed the shadow angle to 143 and i also changed the distance 10px, spread 53% and size 8px. I changed the colour of the shadow to blue.
  Went to layer style and then select gradient overlay.
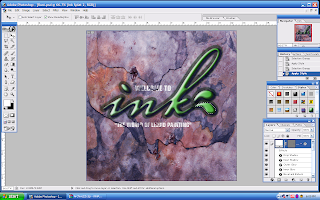
 Original Image
 Here is My Final Output
 In the end, i used rectangle tool again. i created a new mask and for effects i choosed blending options, custom and then i select belend interior effects, blend clipped layers, transperency shapes layer, blend mode multiply and fill opacity 70%.
 Here i used the rectangle tool and so i create a mask vertical thumbinal and then i create another mask. After that i clicked the new mask which i created and i pressed ctrl+del. So, that the background will be hidden. I used custome shape tool to draw the shapes.
Then i went to channel and then i choose the red in the background chanel and i drag it to the layer icon then i create a new channel. After that i went to edit and click define patterns, then i went back to the layer i opened the layer style and go to texture and deselect link with layer and clicked snap to origin. I dragged the effects and named a new style so that i can apply the effects for other object.
 Over here i just drag all the effects i had applied on the "ink" word to the window of styles and then i create a new style and then i applied on the rest of the objects in the image.
Here, i went to bevel and emboss; change the depth, direction up, size 13px and soften 7px.
 Here i went back to inner glow again. I select the blend mode to screen, opacity 89%, technique softer, choke 94%, size 8px and i used green mixed black colour.
  Next i clicked outer glow. Choose green colour and change the blend mode to multiply and for technique i chossed softer.
  After that i went to inner shadow; change the distance to 2px, change choke to 35%, size 9px and change the angle to 148.
 I choose the green colour and then change theangle to -174. I opend layer style again to drop shadow. After that i changed the shadow angle to 143 and i also changed the distance 10px, spread 53% and size 8px. I changed the colour of the shadow to blue.
  Went to layer style and then select gradient overlay.
First of all i went to channel layer which is the word ink and select it with ctrl+click.
 Original Image
Subscribe to:
Posts (Atom)